
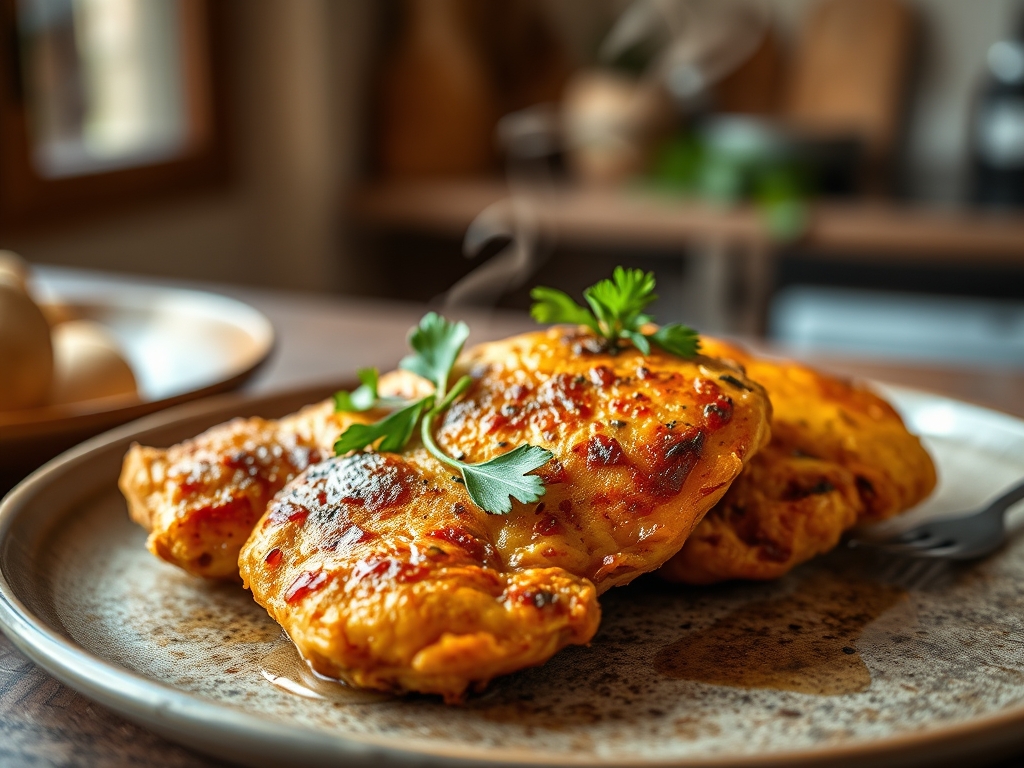
Close your eyes and listen for that distinct, rhythmic crunch; the sound of a golden crust shattering under a serrated knife. We have all been there, staring down a dry, stringy piece of poultry that feels more like a chore than a meal. But today, we are rewriting the narrative on chicken recipes fried breast style. We are moving past the soggy, oil-slicked disasters of the past and into a world of high-definition texture. Achieving that perfect harmony between a succulent interior and a glass-like exterior is not luck; it is pure, beautiful physics. We are going to harness the power of moisture management and heat transfer to turn a humble cut of meat into a culinary masterpiece that stays juicy long after it leaves the pan.
The Gathers:
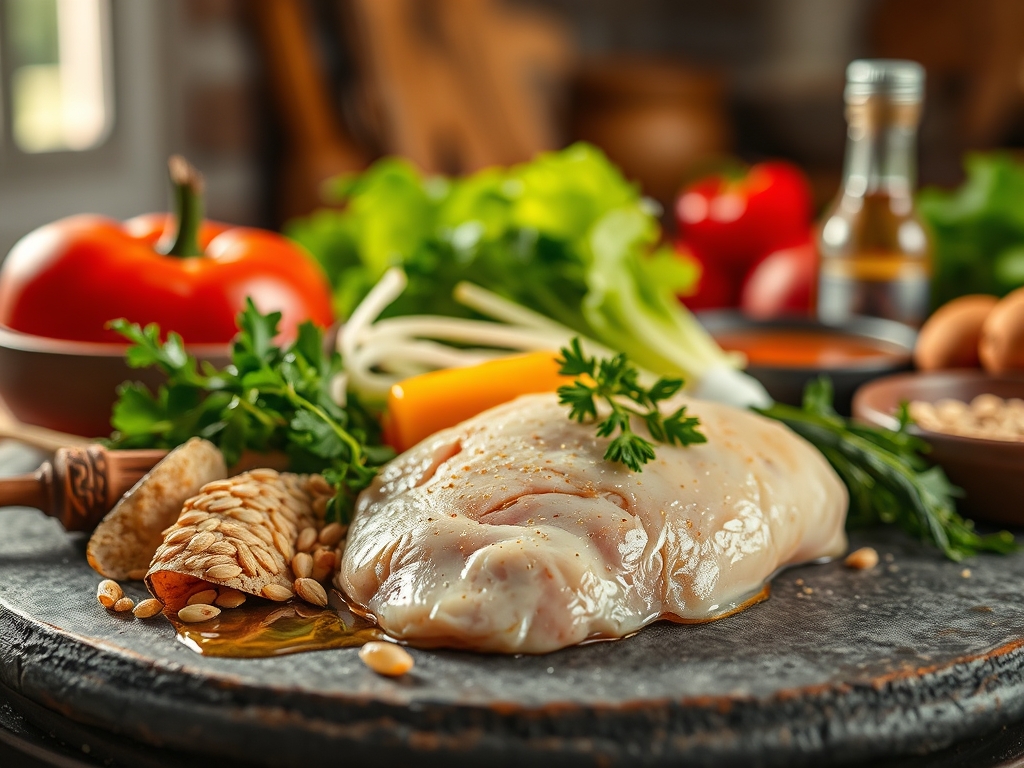
To begin our journey, we must assemble a mise-en-place that respects the chemistry of frying. Start with two large, pasture-raised chicken breasts, which offer a cleaner flavor profile and better muscle density. You will need a viscous buttermilk bath infused with piquant hot sauce and a dash of garlic powder to begin the tenderization process. For the dry dredge, skip the standard all-purpose flour alone. Instead, create a blend of high-protein flour and cornstarch. This mixture is essential because cornstarch interferes with gluten development, ensuring the crust is crisp rather than chewy.
You will also need a high-smoke-point fat, such as avocado oil or refined peanut oil, to prevent the bitter acridity of burnt lipids. Do not forget the aromatics: fresh sprigs of rosemary and crushed garlic cloves to infuse the oil during the final stages of cooking. For those looking for smart substitutions, you can swap buttermilk for a mixture of Greek yogurt and lemon juice. If you are avoiding grains, almond flour combined with crushed pork rinds provides a surprisingly sturdy architecture for your crust. Grab your digital scale to ensure your flour-to-cornstarch ratio is a precise 3:1; precision is the hallmark of a professional kitchen.
The Clock
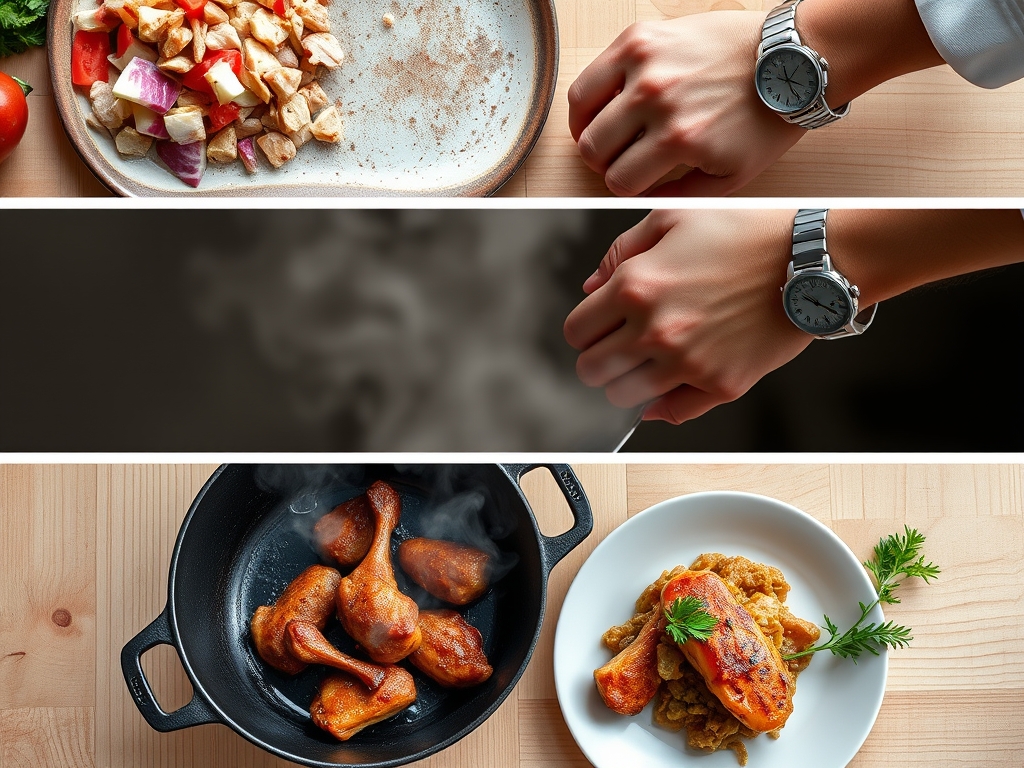
Efficiency in the kitchen is all about the "Chef's Flow." This is the mental map of your cooking process that prevents frantic searching for a bench scraper while your oil is smoking. Your preparation phase, including the mandatory brine, will take approximately 30 minutes of active work and at least two hours of passive chilling. The actual frying time is remarkably fast, usually clocking in at 4 to 6 minutes per side depending on thickness.
Total time from fridge to table is roughly 2 hours and 45 minutes. Respecting the clock means allowing the chicken to come to room temperature for 20 minutes before it hits the heat. If you drop ice-cold meat into a heavy-bottomed skillet, the temperature of the oil will plummet, leading to a greasy, water-logged coating. By syncing your workflow, you ensure that the sides are ready exactly when the meat has finished its mandatory rest.
The Masterclass
1. The Butterfly and Pound
Lay your chicken flat on a cutting board and use a sharp chef's knife to butterfly the breast. Place it between two sheets of plastic wrap and use a meat mallet to level it to an even half-inch thickness. This ensures that the entire piece of meat cooks at the same rate, preventing the tapered edges from drying out before the center is safe to eat.
Pro Tip: This step utilizes mechanical tenderization to break down tough muscle fibers. By creating a uniform surface area, you optimize thermal conductivity, allowing heat to penetrate the meat evenly without overcooking the exterior.
2. The Acidic Brine
Submerge your prepared chicken in the buttermilk mixture. The lactic acid in the buttermilk works gently to break down proteins, while the salt in the mixture penetrates the cell walls through osmosis. This keeps the meat hydrated even when exposed to the intense heat of the frying pan.
Pro Tip: This is an example of enzymatic browning preparation. The sugars and amino acids from the buttermilk will eventually react with the flour in the pan to create a complex flavor profile known as the Maillard reaction.
3. The Double Dredge
Lift the chicken from the brine, letting the excess drip off, and press it firmly into your seasoned flour mixture. For an extra-thick crust, dip it back into the liquid and then back into the flour. Use your fingers to create small "crags" or clumps of flour on the surface of the meat.
Pro Tip: These irregular clumps increase the total surface area of the chicken. When fried, these ridges become the "crunch factors" because they lose moisture faster than the flat surfaces, resulting in a more textural experience.
4. The Temperature Spike
Heat your oil in a heavy-bottomed skillet until it reaches 350 degrees Fahrenheit. Use a digital thermometer to verify this; guessing is the enemy of consistency. Carefully lay the chicken away from you to avoid splashes. Do not crowd the pan; work in batches if necessary to maintain a steady temperature.
Pro Tip: Maintaining a high temperature is crucial for steam evaporation. As the chicken hits the oil, the moisture in the crust turns to steam, pushing outward and preventing the oil from soaking into the breading.
5. The Aromatic Baste
Once the chicken is flipped and the second side is golden, add a knob of butter, garlic, and herbs to the pan. Use a large spoon to continuously pour the foaming butter over the chicken. This adds a final layer of richness and ensures the nooks and crannies are perfectly browned.
Pro Tip: This technique, often used in French cooking, facilitates convection heating. The hot butter fills the gaps that the shallow oil might miss, ensuring a perfectly even, mahogany finish.
6. The Rest and Recovery
Transfer the chicken to a wire cooling rack set over a baking sheet. Do not place it on paper towels, as the trapped steam will turn the bottom of your chicken soggy. Let it rest for at least five minutes before slicing.
Pro Tip: This allows for thermal carryover. The internal temperature will continue to rise by about 5 degrees after removal from the heat, while the juices redistribute throughout the meat rather than spilling out onto the board.
The Deep Dive
When we look at the macro nutrition of this dish, a standard 6-ounce fried breast contains roughly 350 to 400 calories, with a high protein count of 45 grams. To make this keto-friendly, replace the flour with a mixture of almond flour and parmesan cheese. For a gluten-free version, use a blend of rice flour and potato starch, which actually produces an incredibly light and airy "tempura-style" crunch.
If you encounter pitfalls, don't panic. If your breading is falling off, it usually means the meat was too wet before the first dredge; always pat the meat dry if you aren't using a wet brine. If the chicken is dark on the outside but raw inside, your oil was too hot; lower the flame and finish the chicken in a 350-degree oven. If the crust is pale and greasy, your oil was too cold; wait for the oil to shimmer before adding the next batch.
For meal prep, never reheat fried chicken in the microwave. The waves agitate water molecules, turning your crust into a sponge. Instead, use an air fryer or a toaster oven at 375 degrees for 4 minutes. This re-activates the fats in the crust, crisping it back up to "day-one" quality.
The Wrap-Up
Mastering chicken recipes fried breast style is a rite of passage for any home cook who wants to blend science with soul. By focusing on the mechanics of the dredge and the precision of oil temperature, you move from "making dinner" to "crafting an experience." Remember to keep your tools sharp, your oil hot, and your buttermilk cold. Now, go grab your tongs and get frying; your kitchen is about to smell like a five-star bistro.
The Kitchen Table
How do I keep the breading from falling off?
Ensure the chicken surface is not overly slick. A light dusting of plain flour before the buttermilk dip acts as a "primer," helping the heavier outer coating adhere to the protein fibers during the high-heat expansion of frying.
What is the best oil for frying chicken?
Choose oils with high smoke points like peanut, canola, or grapeseed oil. These fats can withstand the 350-degree heat required for a crisp exterior without breaking down into acrid, smoky compounds that ruin the flavor of the meat.
Can I fry chicken breast without a deep fryer?
Absolutely. A heavy-bottomed skillet or a cast-iron pan is actually preferred by many chefs. It allows for better contact with the heat source and makes it easier to perform the aromatic butter baste during the final minutes of cooking.
How do I know when the chicken is done?
The most reliable method is using a digital thermometer. Aim for an internal temperature of 160 degrees Fahrenheit. The temperature will rise to the food-safe 165 degrees during the resting phase due to the science of thermal carryover.